This guide to building a shield out of a section of a large plastic barrel for use in SCA youth combat was written in March 2011 by Jaekel and Shamus of the East Kingdom’s Barony of Bhakail.
It is also available in PDF format.
In this guide we will be making a shield from barrel plastic for use in SCA Youth Combat as per East Kingdom standards. This method is useful for creating just about any shape and style of medieval shield desired.
What you will need
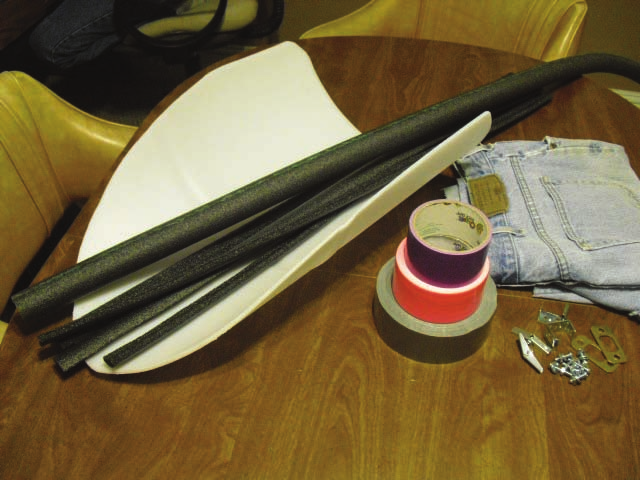
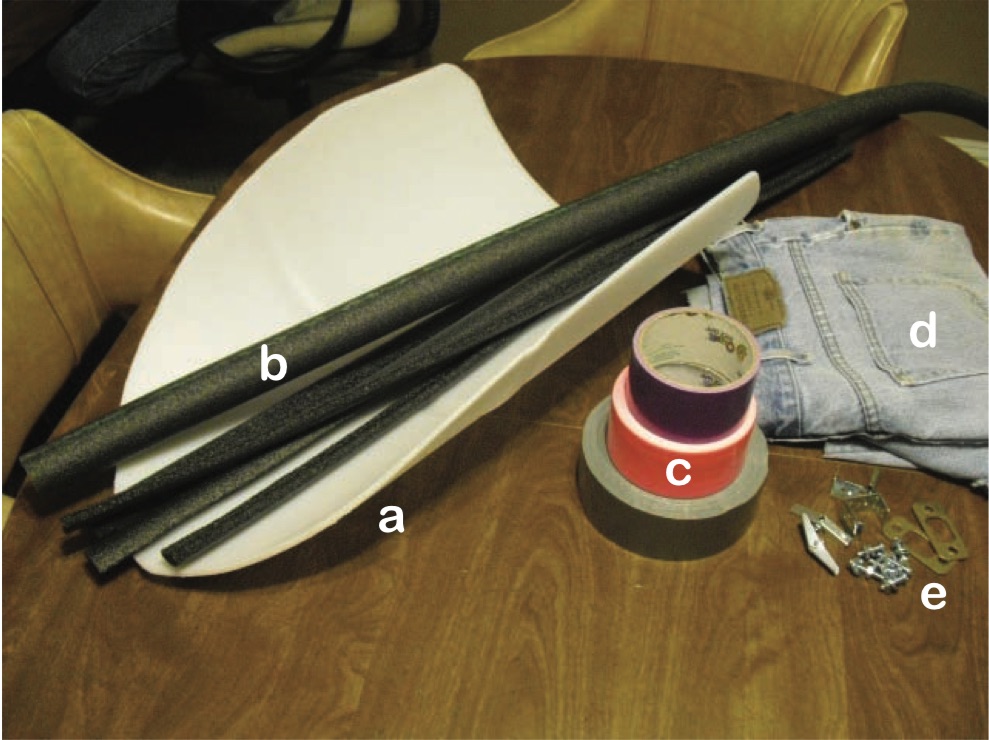
Materials (pictured below):
a) Barrel plastic
b) Pipe Foam
c) Duck tape
d) Denim (optional)
e) Nuts, bolts, etc. (depending on preference)
Additional Tools:
f) Saw
g) Drill
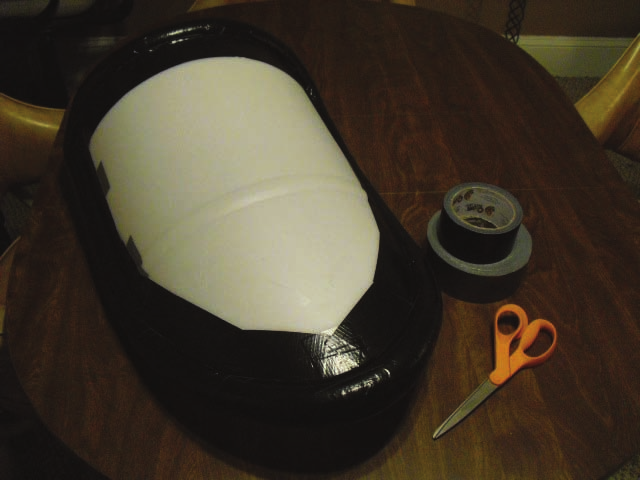
Shield shape cut from barrel plastic
The first thing you need, of course, is a shield shaped piece of barrel plastic. The requirement is for a shield shape that is recognizable as a medieval shield and is size proportional to the youth fighter.
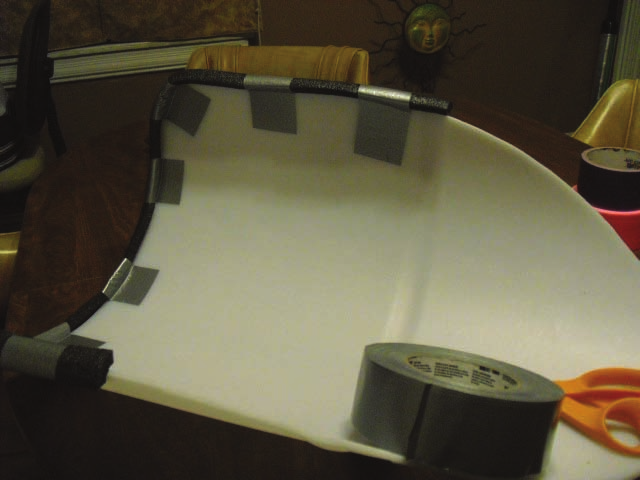
Foam edge padding (1st layer, optional)
Having made quite a few of these, I have developed a preference for adding an inner layer of pipe foam along the shield edge as shown in progress below. I tend to use a one-quarter diameter length of pipe foam for the inner padding and hold it in place with strategically positioned duck tape. This has proven to greatly extend the lifespan of the shield as well as add increased protection in the event of a shield accidentally coming into contact with an opponent’s body.
Foam edge padding
After finishing the inner layer of pipe foam padding along the entire shield edge (not required, but highly recommended!), you then need to cover the complete outer edge of the shield with padding. The pipe foam with adhesive edges works great for this, though your mileage may vary.
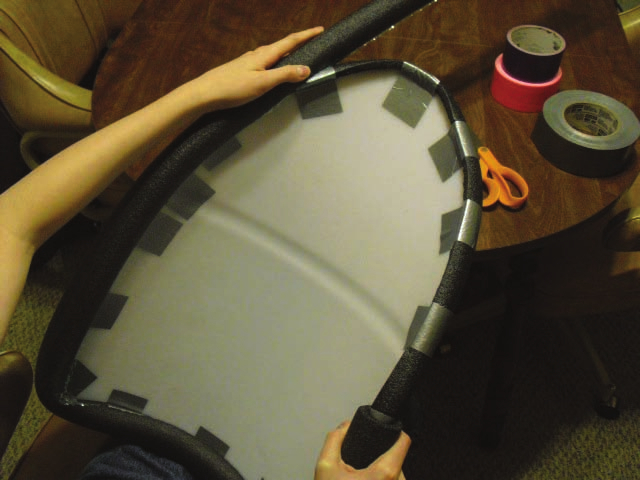
Foam edge padding (complete)
Your shield should now look something like the one pictured below. Even if you used the pipe foam with adhesive edges, anchor down the padding with additional pieces of duck tape as shown.
Duck tape the edging
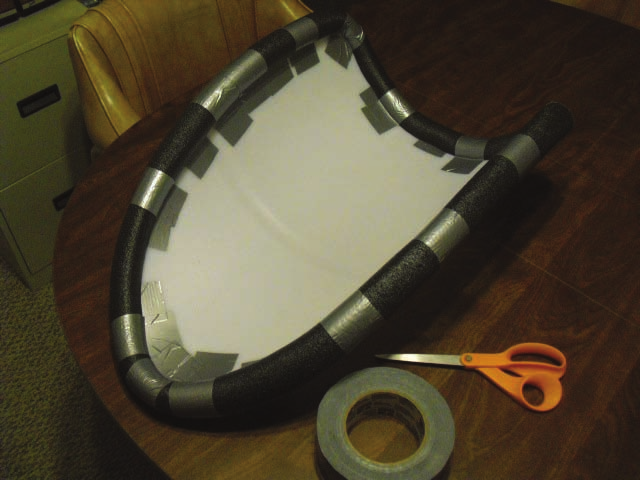
Now we need to protect the pipe foam and solidly hold it in place by adding a layer of duck tape as shown in progress below. Use high quality duck tape to more than double the lifespan of your shield.
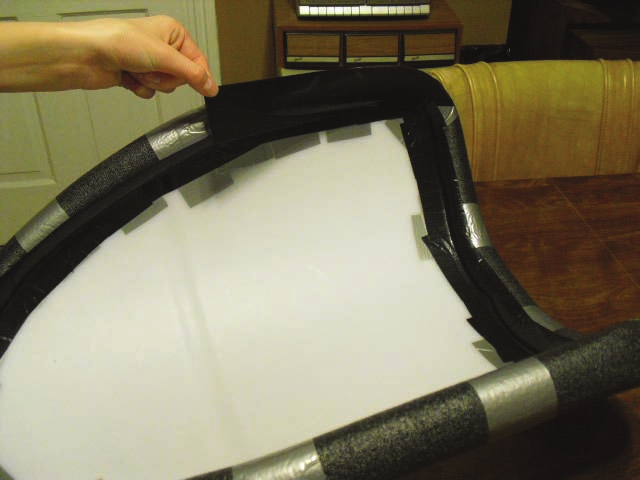
Edging (complete)
Once the edging duck tape layer is complete, your shield should look similar to the one pictured below.
Seriously, I can’t stress enough that good quality duck tape really pays off here so use the best you’ve got to greatly extend how long it will be before you have to re-do it someday. These edges will truly take a beating over the combat life of this shield.
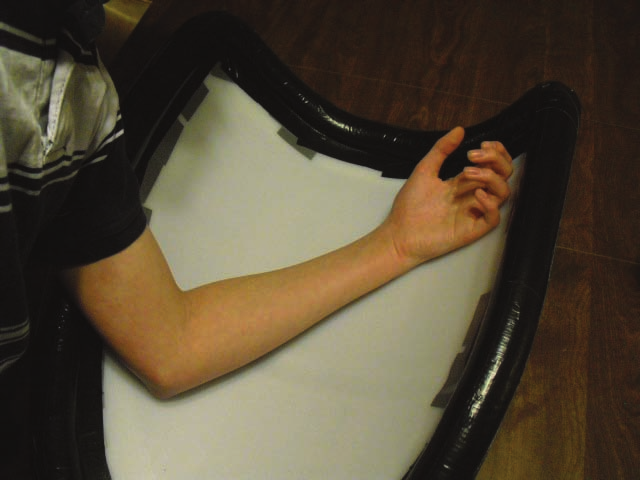
Strapping
Now that the edging is in place and you can get a good feel for the balance of the shield, it is time to mark the inside of the barrel plastic for where the hand and arm strapping will go.
Remember to take into consideration that the youth fighter will be wearing gloves and elbow/arm protection!
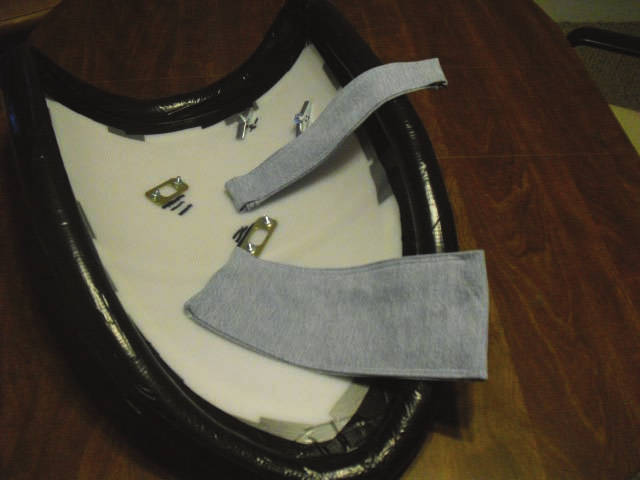
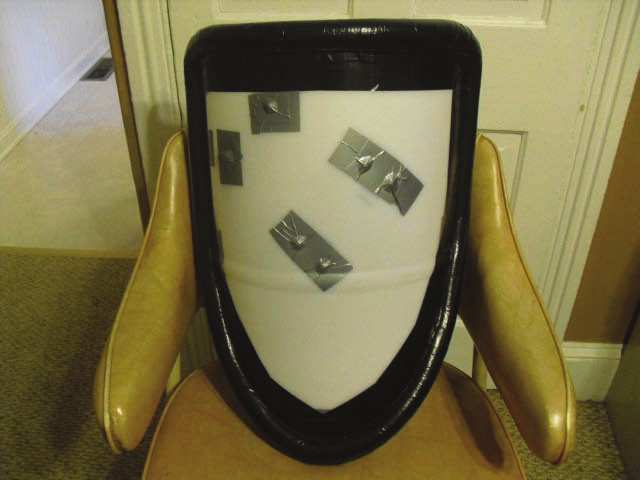
Strapping (marking and drilling)
For this shield, I will be using denim from an old pair of blue jeans for the hand and arm strapping. I typically like to use a relatively cheap garage door handle for the hand grip, but I am going with all denim this time.
Small bits of metal, like the unused pieces from a door lock set pictured below, hold the denim in place while keeping it from tearing on just the plain bolts. Using washers should go without saying, but I’m saying it just in case. 😉
I have seen many variations of strapping over the years and personally just simply prefer the denim. Leather, though very popular, tends to snap at inopportune moments.
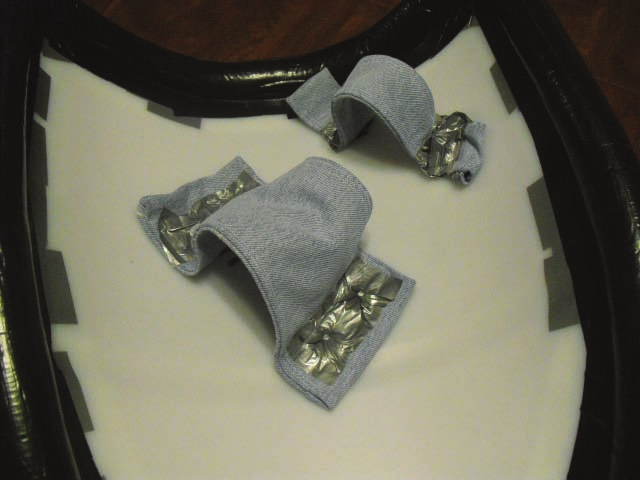
Strapping (complete)
The bolts, nuts, wires, or other objects that may project from the shield (front AND back) after attaching the strapping needs to be covered by padding and/or duck tape.
The guidelines call for anything sticking up more than 3/8″ to be covered with padding or duck tape, but I cover everything up regardless just to be safe.
Completing the basic shield
With the edging and strapping done, you now have a shield ready to use for youth combat.
However, with such a nice “blank canvas” like this to work with, why stop here? To really get your youth fighter into the SCAdian spirit, adding a bit of heraldry can really add something to their entire experience.
If you are up for adding heraldry to the shield, please continue reading.
Heraldry (field)
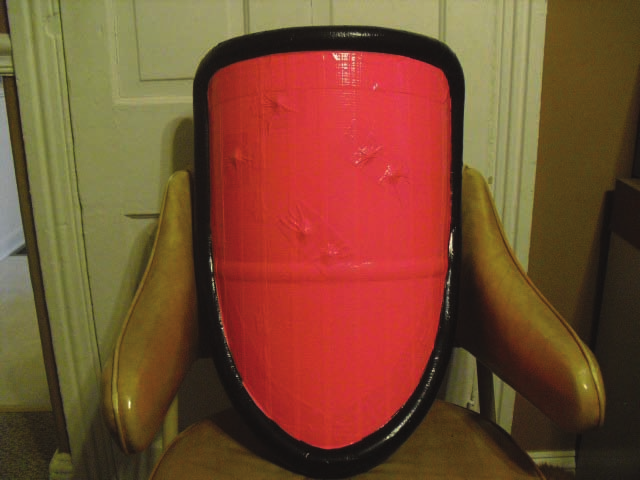
Once the youth fighter has determined what heraldry they would like to use to represent them on the shield, start by using duck tape to apply the field (background) color(s).
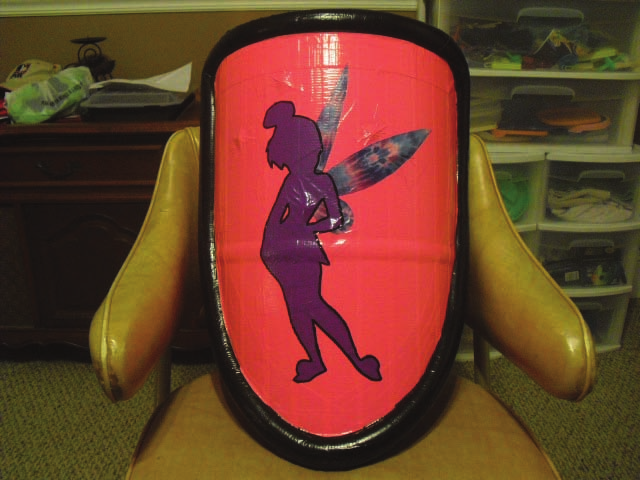
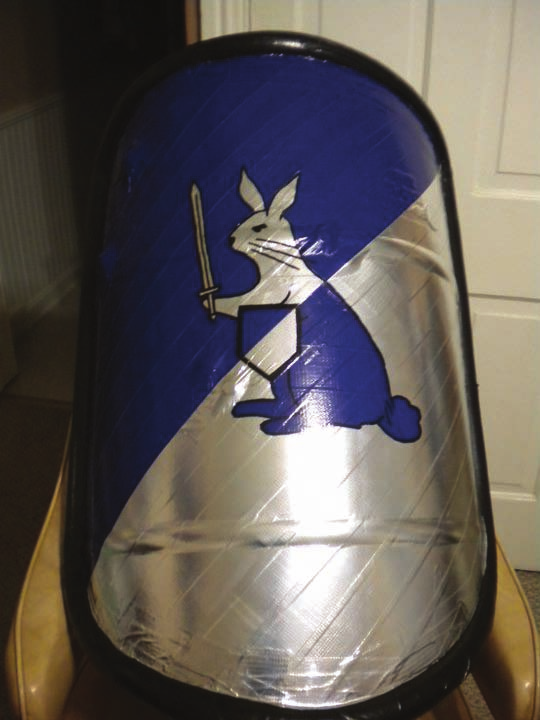
This isn’t necessarily something that needs to be registered and approved at this stage, of course. It can simply be something similar to the case of this particular shield (which is for a very young female youth fighter). She requests a purple fairy on a pink field for her heraldry.
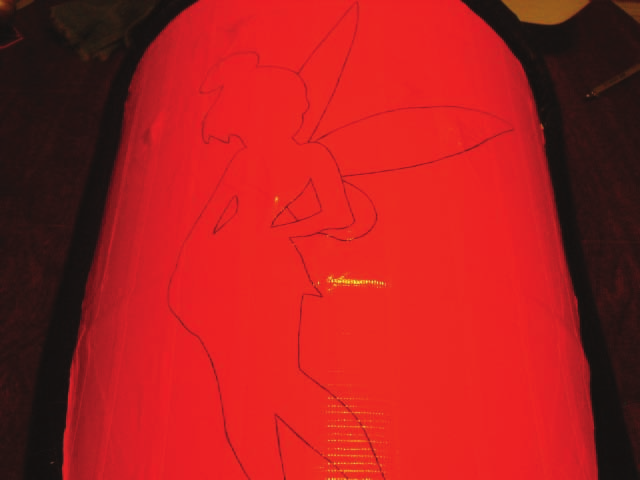
Heraldry (outline emblems)
Next, outline the heraldic elements onto the field of the shield. You will use these outlines as a guide to show where the duck tape for the next layer will go.
Here we have a “fairy with attitude” taking shape.
Heraldry (complete)
After filling in the outline with duck tape, going along the edges of the heraldry with a black permanent marker will really make the heraldic elements show up well on the shield (as well as hide any minor problems with the edges of the duck tape you just added).
My goal here in doing this is to help create gear that the youth fighter will become proud of and feel connected to. Lessons on period appropriate heraldry will happen all in due time in the SCA and this can be a perfect first step in sparking a child’s interest in the subject.